Product Description
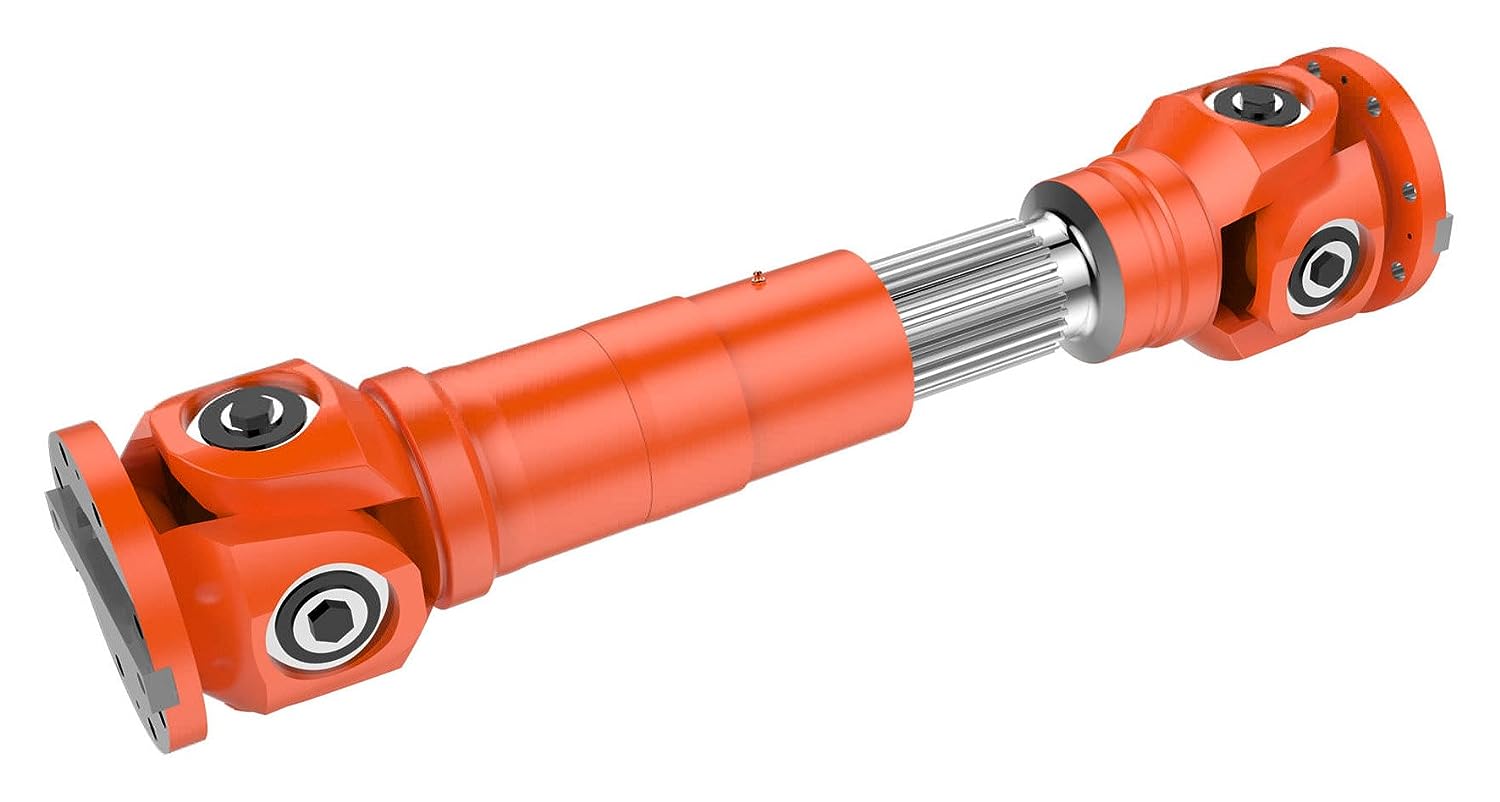
5-8516X INDUSTRIAL CARDAN SHAFT UNIVERSAL JOINT
Features:
1, Material: C45(1045) carbon steel, 40Cr steel, 20CrMnTi
2, Excellent performance, long service life and competitive price.
3, Great intensity and rigidity.
4, On time delivery
5, Own ISO9000, TS16949 Certificates
6, Best price with the highest quality.
Quality Control:
1. Chemical Composition confirm after Ingot
2. Hardness after Heat Treatment
3. Final Dimension Check
Quality Assurance Document:
All the Q. A Document as per Client Requirement will be submitted when goods ready.
Packing and Shipping
1. Standard: Wooden case or carton for export
2. Delivery: As per contract delivery on time
3. Shipping: As per client request. We can accept CIF, Door to Door etc. Or client authorized agent we supply all the necessary assistant
Our service:
1. Customized and designed according to the customers’ sample, drawing or requirements
2. Following the customers’ requirements or as our usual packing
3. High quality and competitive price and pure-hearted service.
4. Strictly quality control according to ISO9001: 2008.
5. Flexible minimum order quantity
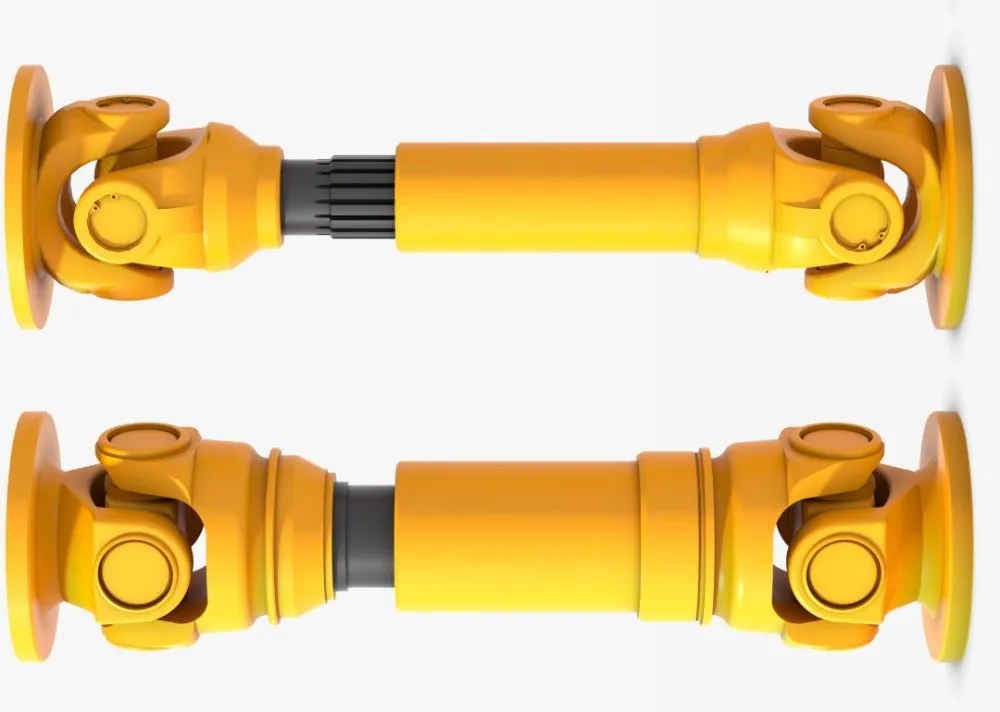
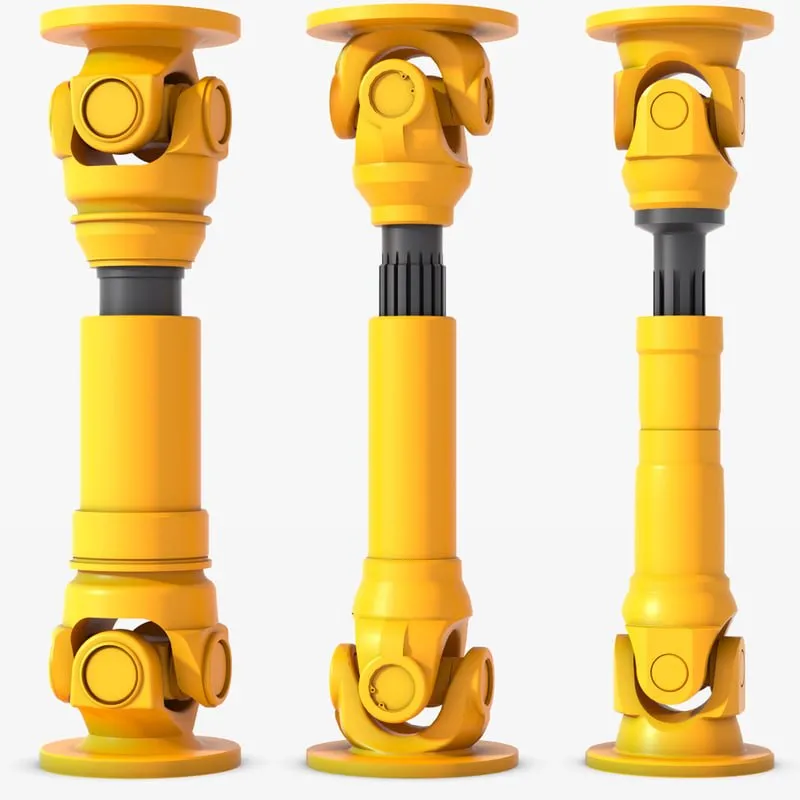
Our universal joints are with good quality and reasonable price. We can supply you all kinds of u-joints for more than 20 brands’ cars, mechanic machines and agriculture machines.
We can also supply universal joint, heavy duty universal joint, CHINAMFG universal joint, gmb universal joints, small universal joint shaft, universal joint bearing, agriculture universal joints, small universal joints, universal joint yoke, universal joint coupling, universal joint spider, tractor universal joint, CHINAMFG universal joint, universal joints cross bearing, plastic universal joint, universal joint cross, universal joint for komatsu, universal joint shaft, industrial universal joint, universal joint connector, CHINAMFG universal joint, universal joint impact sockets, steering universal joint, universal joint pin, etc.
| FIG | Part No. | D mm | O mm | L mm | Spicer | Precision | GMB |
| A | GUN26 | 23.82 | 61.3 | 37125 -11975 | N2461 | UJ110 | |
| A | GUN30 | 30.17 | 90.1 | 37125-85461 | N3092 | UJ115 | |
| A | GUN32 | 35.5 | 119.2 | 37125-58026 | N36119 | UJ117 | |
| A | GUN33 | 43 | 128 | 37125-99901 | ND43128 | UJ119 | |
| A | GUN36 | 25 | 77.6 | 37125-4101 | NP2578 | UJ120 | |
| A | GUN44 | 20.5 | 56.5 | 37125-99000 | UJ124 | ||
| A | GUN45 | 20.07 | 52.4 | 37125-H8500 | |||
| A | GUN47 | 27 | 81.75 | 37125-25571 | |||
| A | GUN48 | 27 | 81.75 | 37125-7F571 | |||
| A | GUS2 | 20.02 | 35 | 27100-67000 | |||
| A | GUS6 | 20.1 | 59.8 | 27200-6571 | |||
| A | GUS7 | 25 | 63.8 | 27200-83571 | |||
| A | GUSR-3 | 28 | 52.6 | 6232-4300 | |||
| A | GUT-11 | 20 | 57 | 5711-10011 | T2057 | UJ212 | |
| A | GUT-14 | 28.5 | 77.9 | 5711-6571 | T2978 | UJ214 | |
| A | GUT-15 | 34 | 107 | 5711-55011 | T34107 | UJ216 | |
| A | GUT-16 | 40 | 118 | 5711-55571 | T40119 | UJ215 | |
| A | GUT-19 | 20 | 57 | 5711-1571 | T2057 | UJ222 | |
| A | GUT-22 | 40 | 118 | 5711-55571 | |||
| A | GUT-24 | 22.06 | 57.5 | ||||
| A | K5-13XR | 26.99 | 81.76 | ||||
| A | K5GB10R | 30.188 | 106.35 | ||||
| A | K5L4R | 27 | 74.6 | ||||
| A | KC2832ADW | 40 | 115.6 | ||||
| A | KC2932ADW | 44 | 129 | ||||
| A | S-E129 | 41.27 | 126 | ||||
| A | S-F365 | 55.03 | 164 | ||||
| A | S-F366 | 60.03 | 162 | ||||
| A | SPL140-1X | 49.22 | 139 | ||||
| A | SPL170-1X | 55 | 165 | ||||
| A | SPL250-1X | 60 | 163 | ||||
| A | SPL70-1X | 34.9 | 126.1 | CZ256 | |||
| A | SPL90-1X | 41.28 | 126 | CZ271 | |||
| A | U040 | 23.8 | 61.3 | 5-101X/502X | 340 | UJ040 | |
| A | U050 | 23.8 | 61.3 | 5-102X/5-111X | 341 | UJ050 | |
| A | U080 | 26.94 | 61.85 | 5-310X | 437G | UJ080 | |
| A | U100 | 27 | 81.8 | 5-153X/5-204X | 329/521 | UJ100 | |
| A | U110 | 27 | 74.6 | 5-94X | 344 | UJ110 | |
| A | U126 | 16.05 | 40 | ST1640 | – | UJ126 | |
| A | U180 | 20 | 57 | 5-1500X | 395 | UJ180 | |
| A | U189 | 40 | 118 | GUT16 | U189 |
/* January 22, 2571 19:08:37 */!function(){function s(e,r){var a,o={};try{e&&e.split(“,”).forEach(function(e,t){e&&(a=e.match(/(.*?):(.*)$/))&&1
| Condition: | New |
|---|---|
| Material: | Steel |
| Type: | Universal Joint |
| Transport Package: | Standard Sea Worthy Package |
| Specification: | ISO |
| Trademark: | MW |
| Customization: |
Available
| Customized Request |
|---|
How do you calculate the operating angles of a cardan joint?
The operating angles of a cardan joint can be calculated based on the angular misalignment between the input and output shafts. The operating angles are crucial for determining the joint’s performance and ensuring its proper functioning. Here’s a detailed explanation of how to calculate the operating angles of a cardan joint:
- Identify the Shaft Axes: Begin by identifying the axes of the input and output shafts connected by the cardan joint. These axes represent the rotational axes of the shafts.
- Measure the Angular Misalignments: Measure the angular misalignments between the shaft axes. The misalignments are typically measured in terms of angles, such as angular displacement in degrees or radians. There are three types of misalignments to consider:
- Angular Misalignment (α): This refers to the angular difference between the two shaft axes in the horizontal plane (X-Y plane).
- Parallel Misalignment (β): Parallel misalignment represents the offset or displacement between the two shaft axes in the vertical plane (Z-axis).
- Axial Misalignment (γ): Axial misalignment refers to the shift or displacement of one shaft along its axis with respect to the other shaft.
- Calculate the Operating Angles: Once the misalignments are measured, the operating angles can be calculated using trigonometric functions. The operating angles are:
- Operating Angle (θ): The operating angle is the total angular misalignment between the input and output shafts. It is calculated as the square root of the sum of the squares of the individual misalignments:
These calculated operating angles provide valuable information about the misalignment and geometry of the cardan joint. They help in selecting the appropriate joint size, determining the joint’s torque capacity, assessing potential operating issues, and ensuring proper installation and alignment of the joint within the system.
It is important to note that these calculations assume small operating angles and neglect any elastic deformation or non-linearities that may occur in the joint. In cases where larger operating angles or more precise calculations are required, advanced engineering techniques or software tools specific to cardan joint analysis may be employed.
What are the safety considerations when working with cardan joints?
Working with cardan joints requires careful attention to safety to prevent accidents, injuries, and equipment damage. Cardan joints are mechanical components used for torque transmission and misalignment compensation, and they operate under various loads and conditions. Here are important safety considerations to keep in mind when working with cardan joints:
- Proper Training and Knowledge: Ensure that individuals working with cardan joints have proper training and understanding of their operation, installation, and maintenance. Adequate knowledge of safe working practices, procedures, and potential hazards associated with cardan joints is crucial.
- Personal Protective Equipment (PPE): Use appropriate personal protective equipment, such as safety glasses, gloves, and protective clothing, when handling cardan joints. PPE protects against potential hazards like flying debris, sharp edges, or accidental contact with rotating components.
- Lockout/Tagout: Before performing any maintenance or repair work involving cardan joints, follow lockout/tagout procedures to isolate and de-energize the system. This prevents accidental startup or movement of machinery, ensuring the safety of personnel working on or near the cardan joints.
- Secure Mounting and Fastening: Ensure that cardan joints are securely mounted and properly fastened to prevent unexpected movement or dislodgment during operation. Loose joints or fasteners can lead to component failure, sudden movements, or damage to other parts of the system.
- Torque and Load Limits: Adhere to the recommended torque and load limits specified by the manufacturer for the cardan joints. Exceeding these limits can result in premature wear, deformation, or failure of the joints, posing safety risks and compromising the overall system’s functionality.
- Regular Inspection and Maintenance: Implement a regular inspection and maintenance program for the cardan joints. Inspect for signs of wear, damage, or misalignment, and address any issues promptly. Lubricate the joints according to the manufacturer’s recommendations to ensure smooth operation and prevent excessive friction or overheating.
- Safe Handling and Lifting: When handling or lifting cardan joints, use appropriate lifting equipment and techniques. Cardan joints can be heavy, and improper lifting can lead to strain or injuries. Ensure that lifting devices have the capacity to handle the weight of the joints safely.
- Avoid Contact with Rotating Components: Never reach into or make contact with rotating components of a system that incorporates cardan joints while the system is in operation. Keep loose clothing, jewelry, and other items away from moving parts to prevent entanglement or injury.
- Proper Disposal of Used or Damaged Joints: Follow proper disposal procedures for used or damaged cardan joints. Consult local regulations and guidelines for the disposal of mechanical components to minimize environmental impact and ensure compliance with safety and waste management standards.
- Manufacturer’s Guidelines: Always refer to and follow the manufacturer’s guidelines, instructions, and warnings specific to the cardan joints being used. Manufacturers provide important safety information, installation procedures, and maintenance recommendations specific to their products.
By addressing these safety considerations, individuals can mitigate potential risks associated with working with cardan joints, promote a safe working environment, and ensure the reliable and efficient operation of the systems they are integrated into.
How do you install a cardan joint?
Installing a cardan joint involves several steps to ensure proper alignment, secure attachment, and reliable operation. Here’s a detailed explanation of the process for installing a cardan joint:
- Prepare the Components: Gather all the necessary components for the installation, including the cardan joint, yokes, bearings, retaining rings, and any additional hardware required. Ensure that the components are clean and free from dirt, debris, or damage.
- Align the Shafts: Position the input and output shafts that will be connected by the cardan joint. Align the shafts as closely as possible to minimize misalignment. The shafts should be collinear and positioned at the desired angle or position for the specific application.
- Attach the Yokes: Attach the yokes to the input and output shafts. The yokes typically have holes or bores that match the diameter of the shafts. Securely fasten the yokes to the shafts using appropriate fasteners, such as set screws or bolts. Ensure that the yokes are tightly secured to prevent any movement or slippage during operation.
- Assemble the Cardan Joint: Assemble the cardan joint by connecting the yokes with the cross-shaped component. The cross should fit snugly into the yoke holes or bores. Apply a suitable lubricant to the bearings to ensure smooth rotation and reduce friction. Some cardan joints may have retaining rings or clips to secure the bearings in place. Make sure all the components are properly aligned and seated.
- Check for Clearance: Verify that there is adequate clearance between the cardan joint and any surrounding components, such as chassis or housing. Ensure that the cardan joint can rotate freely without any obstructions or interference. If necessary, adjust the positioning or mounting of the cardan joint to provide sufficient clearance.
- Perform a Trial Run: Before finalizing the installation, perform a trial run to check the functionality of the cardan joint. Rotate the connected shafts manually or with a suitable power source and observe the movement of the joint. Ensure that there are no unusual noises, binding, or excessive play. If any issues are detected, investigate and address them before proceeding.
- Secure the Cardan Joint: Once the functionality is confirmed, secure the cardan joint in its final position. This may involve tightening additional fasteners or locking mechanisms to keep the joint in place. Use the appropriate torque specifications provided by the manufacturer to ensure proper tightening without damaging the components.
- Perform Final Checks: Double-check all the connections, fasteners, and clearances to ensure that everything is properly installed and secured. Verify that the cardan joint operates smoothly and without any issues. Inspect the entire system for any signs of misalignment, excessive vibration, or other abnormalities.
It is important to follow the specific installation instructions provided by the manufacturer of the cardan joint, as different designs and configurations may have specific requirements. If you are unsure or unfamiliar with the installation process, it is recommended to consult the manufacturer’s documentation or seek assistance from a qualified professional to ensure a proper and safe installation of the cardan joint.


editor by CX 2024-04-26